


.jpg)


If you've just got ahold of your Insta360 X5 (or maybe you're waiting for it to arrive), you're probably itching to get started! But whether you're a 360º newbie or upgrading from one of our older models, everyone can do with learning some top tips, tricks, and settings. So here is our ultimate guide to getting the clearest, crispiest, most mind-blowing shots possible with X5 like this. Enjoy.
Read on or jump directly to one of these sections:
Firmware and Camera Setup
Best Settings: 360º Mode
Best Settings: Single-Lens Mode
Shooting Tips
Settings for Every Scenario
Editing
Export Settings
How does X5 compare to X4? Check out this article.
Firmware and Camera Setup
Run through this checklist before you start:
- Update your camera's firmware and the Insta360 app to the latest version. You should receive a prompt in the app when these are available, or you can download them any time from the Insta360 official website.
- Customize the Quick and Lens buttons to have your favorite settings at your fingertips. Just head to Settings > Customize Buttons.
- X5's lenses are super tough, so for the best image quality, we recommend using it without lens guards. If you're filming any action or extreme sports though, be sure to pick up the Standard or Premium Lens Guards. Once they're installed, you don't need to do anything: the camera automatically detects when they're installed or removed and adjusts the stitching algorithm for the best effect! They're not waterproof, though, so remember to take them off before those pool days.
- Make sure you have the right type of SD card. We recommend picking up a memory card from our store or buying name-brand microSD cards, such as SanDisk, from official resellers.
- Last but not least, remove all stickers and wipe the lens. No one wants oily fingerprints or water droplets ruining their footage.
Best Settings - 360º Mode:
Ah, 360º video—this is what you (probably) came for. Usually, filming in Auto Mode will do the trick, but if you want to go hands-on, switch to Manual Mode and play around. Here's a rundown of the best shooting settings for most scenarios:
Daytime
- 8K30fps Video Mode
- Color Profile: Standard
- Sharpness: Medium or Low
- Bitrate: Set to "High" for optimal image quality or "Standard" for a smaller file size
Tip: 8K30fps is best in outdoor daytime environments, e.g., beaches, sunny days, city streets at midday, open fields under clear skies... you get the picture.
Bright Outdoor Scenes/Backlighting/General Indoor Scenes:
If you're shooting in strong light or backlit environments, lower the resolution to 5.7K and enable Active HDR for more natural transitions between light and dark and better dynamic range.
- 5.7K30fps Video Mode
- Active HDR: On
- Color Profile: Standard
- Sharpness: Medium or Low
- Bitrate: Set to "High" for optimal image quality or "Standard" for a smaller file size

Tip: Active HDR can be turned on or off in Video Mode. It doesn't support 8K or 5.7K+.
Night/Dark Indoor Scenes
This is where X5's new PureVideo Mode comes in. Its advanced AI noise reduction and optimized dynamic range deliver clear, vivid footage no matter the lighting, so you can shoot after hours.
- 8K30fps PureVideo Mode
- Color Profile: Standard
- Sharpness: Medium or Low
- Bitrate: Set to "High" for optimal image quality or "Standard" for a smaller file size
Slow Motion
X5's higher frame rates are perfect for smooth, sharp action shots. Slow down fast trails and clean runs and speed ramp your shots:
- Resolution: 5.7K60fps
- Color Profile: Standard
- Sharpness: Low or Medium
- Audio: Auto Wind Noise Reduction - Strong
Tip: Film in cinematic 4K120fps for 4x slow-motion playback without sacrificing detail. It looks best in good daylight conditions.
72MP 360º Photos
Freeze any moment with a quality 72MP PureShot 360º photo. Photos are processed in-camera for ready-to-share snaps with less noise and improved coloring.

Tip: Try capturing moments or angles with a "2-in-1 perspective"! These look super cool and are only possible with 360º cameras.
InstaFrame Mode - Two Videos in One
A brand-new mode for 360º shooting. Record a perfectly framed, instantly shareable flat video up to 1080p30fps with no editing or reframing needed, and a full 360º video up to 5.7K+30fps at the same time.
Tap InstaFrame Mode in the 360º shooting mode menu and choose from a Fixed View or a Selfie View:
- Fixed View follows the same perspective throughout the video. You can choose between forward, back, top, and bottom views, or choose "Custom View" and drag the screen to find the direction you want to follow. This option is ideal when the camera is mounted on a motorcycle or bike.
- Selfie View automatically identifies and tracks the nearest subject throughout the video.
The 360º video then offers the flexibility for you to revisit unexpected moments from every angle. You can check both the flat video and the 360º video in your camera's album.
Tip: Although InstaFrame Mode doesn't support Gesture Control, pick up with Mini Remote to adjust the angle from a distance when filming in InstaFrame Mode. Press it twice to switch between Fixed and Selfie View, and three times for a 360º spin or barrel roll.
Best Settings - Single-Lens Mode:
4K60fps
From full 360º to immersive POVs, X5 can do it all. Mount X5 onto your chest, handlebars, or helmet, and use Single-Lens Mode for super smooth POV shots up to 4K60fps. It films with just one lens, so that means no reframing, no quality loss in the edit, and no need for any other wide-angle camera. This looks best in bright lighting.
MaxView
For an ultra-wide 170° FOV up to 4K30fps, shoot in Single-Lens Mode, choose FreeFrame Video, and select MaxView FOV. You can adjust the aspect ratio in post without cropping your video further, as would be necessary with regular wide-angle action cameras.
Me Mode
Skip reframing and turn X5 into a regular "point-and-shoot" camera with Me Mode. Using the Invisible Selfie Stick, you can film a 170° FOV first-person video up to 4K30fps that keeps you centered throughout.
There's also the option of 2.7K120fps for 4x slow-mo shots with in-camera stitching and ready-to-share .mp4 files.
Tip: Tap the button on the camera's touchscreen to flip the lens and film someone else.
Shooting Tips
Here are some basic tips for shooting in 360º. New here? Read through, take notes, make a mindmap... you do you. If you're a seasoned 360º user, it's always worth refreshing your memory.
Stitching
X5 is a 360º camera, and our 360º cameras have two lenses. That means there's a stitch line on the side where the footage is combined into one image.
Insta360 cameras process the line in real time using our proprietary 360º video stitching algorithm, but you can help to make the stitch line less obvious in your footage:
- Avoid placing main objects in the stitch line on the side of the camera.
- Don't rotate the camera while shooting. It's easier for the stitching algorithm to align the footage when your camera is in a fixed position.
- Don't get too close to the camera and try to keep a distance of around 2.5ft (80cm).
- Select an angle where the stitch line is less obvious when reframing your footage to a flat video.
Tip: When using the Invisible Dive Case, turn on Dive Case Mode in the camera's Shortcut Menu so X5 can automatically adjust the stitching algorithm.
Exposure and Color Differences
It's important to manage exposure so that there are no color differences between the two lenses. Auto exposure settings are your best bet for keeping exposure balanced. However, if you're using the Chest Mount or similar mounts where one of the lenses is close to your body, use Balanced Exposure.
If your shot includes any bright light sources, try to have the side of the camera facing the light rather than one of the lenses. Pay attention to the position of the sun and adjust your shooting angle to avoid glare.
Invisible Selfie Stick
The Invisible Selfie Stick is a fan-favorite effect, and for good reason! It's an awesome way to capture memories of you and your mates without the pole getting in the way, and you can film mind-blowing third-person shots even if you're traveling solo. For next-level shots, the Extended Edition Selfie Stick extends to 10ft (3m) for unreal creative possibilities. No drone? No problem!
We have a fair few options when it comes to selfie sticks. If you're not sure which one to buy, check out our handy guide to see which is right for you. If you've already got yours, we've put together some tips and tricks on how to use it here.
Replaceable Lenses
While X5's lenses are our toughest ever, that's not the only thing that makes them special... they're also fully replaceable with the Replacement Lens Kit.
We've already got a whole article about why that's pretty damn groundbreaking here, so here's a quick rundown on how to actually replace them instead.
Step 1: Remove Old Lens
- Align the orange mark on the lens grip tool with the white mark on the lens ring.
- Rotate the lens grip tool twice counterclockwise until the lens ring is loose, then lift the tool to remove the ring.
- Use the removal tool to gently lift the edge of the old lens and remove it.
Tip: Place a lens cloth under the camera to avoid scratching the lens.
Step 2: Install New Lens
- Check the inner lens is clean and free from debris.
- Pinch the suction cup with your fingers to pick up the new lens from the lens case and install it.
- Align the lens ring with the camera and rotate the lens grip tool twice clockwise to install.
- Remove the suction cup.
- After replacing the lens, use the in-camera Stitching Calibration feature in settings for the best stitching effect. Swipe down on the touchscreen, tap Settings, and scroll down.
Step 3: Check Installation
The new lens is installed correctly if:
✅ The lens ring is level with the camera and not misaligned.
✅ The white mark on the front lens ring aligns with the microphone.
✅ The white mark on the rear lens ring aligns with the center of the wind guard.
We recommended replacing the lenses in a clean indoor environment to prevent the lenses from collecting dust. Try not to replace the lenses when the humidity is over 60% or outdoors to prevent the lenses from fogging.
Settings for Every Scenario
Now you know the basics for 360º videos, here are some pro tips tailored to each scenario. Find your sport or read through them all, the choice is yours.
Traveling and Videography
Spin your X5 and get that classic cinematic slow-mo with 5.7K120fps Bullet Time, now upgraded for the smoothest experience ever. The Bullet Time Selfie Stick 2.0 combines a Bullet Time handle and Invisible Selfie Stick to easily switch between the two. Get unique videos and group shots with 65°, 75°, and 90° shooting angles, and film in multiple locations and edit them together for a dramatic travel montage.
Tip: Swing at a rate of 1 second per 360° rotation. Try to keep one lens upward and one lens downward.
If you prefer life in the fast lane, try out an 11K Timelapse—it's great for a sunset or watching a city change from day to night.
For vlogs, use Voice Enhancement mode to reduce background noise for clearer audio, or pick up the new Mic Air for true-to-life sound.
Motorcycling
Just like our other cameras, X5 is integrated with top helmet headsets from Sena, Cardo, and more* to take every ride to the next level. Pair it via Bluetooth for hands-free Voice Control and crisp, clear audio directly from your intercom every ride. Be sure to set X5 to Wind Reduction Mode for the best audio quality in windy conditions.
*Find the complete list of compatible models on our website.
Road Mode automatically saves footage based on the storage space set, ensuring a confident and safe ride every time. For greater privacy, Plate Blur automatically conceals license plates in your footage via the Insta360 app. Ride with confidence, knowing your footage stays sharp and personal information remains private.
You can also control your camera with AI-powered Gesture Control. This comes in handy when your camera is mounted out of reach. It works from all angles, even when you have gloves and a helmet on, so you don't need to stop and pull over:
- Palm up: start/stop recording
- Peace sign: take a photo.
For steady third-person shots, try the Motorcycle U-Bolt Mount. Capture onboard shots with the Chest Strap, or get a real rider's perspective with the Helmet Mount Kit. The All-Weather USB Charging Cover is a handy accessory to charge as you record in rainy weather. Get all the essentials in the X5 Motorcycle Multiview Bundle.
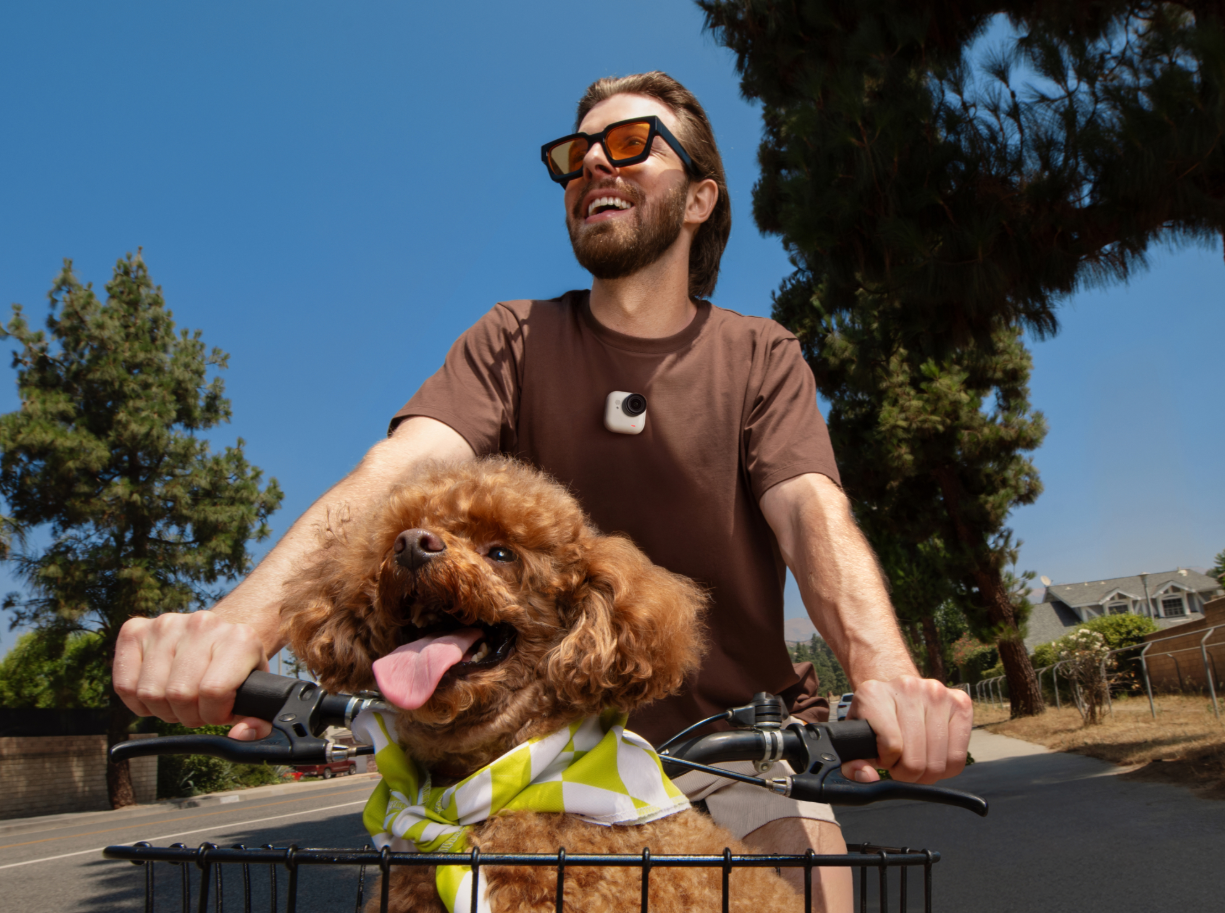
Biking
X5's new magnetic mounting system is ideal for switching out accessories in a flash when you need your hands on your bars. Combined with our wide range of accessories for biking, you can unlock next-level shots with ease. For immersive POVs, try the Bike Headset Cap Mount, Helmet Mount, or the new POV Chest Mount, which sports a close-to-body design for extra stability during high-intensity action. For third-person angles, try the Third-Person Handlebar Mount or Action Invisible Selfie Stick.
Overlay real-time stats in your videos from third-party sports brands and apps, including Garmin, Apple, and more, or directly through GPS Activity Stats on the Insta360 app —no extra gear needed. If you're looking for even more control, the GPS Preview Remote lets you overlay stats and acts as a control center from your wrist or handlebars. If you have X5 mounted out of reach (think near your wheel), you'll be able to live preview your shots and completely control it, too!
Motion ND is a great effect that adds cinematic motion blur without an ND filter. Just tap Motion ND in the Insta360 app or Studio. It shows a real sense of speed as you race down tracks and roads!
Diving & Water Sports
While X5 is IP68 waterproof to 48ft (15m) straight out of the box, we recommend using the Invisible Dive Case for any underwater exploration. Not only does it keep X5 waterproof to 197ft (60m), but it also accounts for light refraction, warping, and distortion that makes 360º video stitching more difficult than on land.
.webp)
The dive case's unique structure provides seamless underwater stitching and stays 100% invisible in your shots for completely unobstructed views. Paired with the Invisible Selfie Stick, you can get third-person diving shots that are impossible to achieve with any other camera! The key is to keep the dive case and selfie stick in a straight line and turn on Dive Case Mode (just swipe down on the touchscreen, and you'll see the icon).
When using X5 in the water:
- Firmly close the USB port and battery cover to guarantee waterproofing. The orange marks should not be visible.
- After using it underwater, you might notice the microphone isn't performing to its regular standard. Don't panic, this is completely normal. Just allow it to air dry and it will be right as rain after 24 hours.
- Turn on AquaVision 2.0 in the Insta360 app or Studio to auto-balance colors and remove that blue haze from your underwater shots.
For everything you could ever need, pick up the X5 Invisible Dive Bundle.
Winter Sports
If you're hitting the slopes, Me Mode is a great way to slow down shreds and improve your technique. With your whole body in frame, you can easily analyze your movements and see where you might be going wrong. The Action Invisible Selfie Stick is perfect for this, with its ultra-durable design for high-intensity sports and action.
If you're finding it hard to operate the camera with all your winter gear, the new Twist to Shoot feature is a real winner for winter. Simply rotate your selfie stick back and forth twice to start/stop filming or take a photo.
For skiers, attach the Ski Pole Mount to your pole for third-person shots without juggling poles and sticks! And don't worry about being knocked off course; it has a unique center of gravity design, so you stay balanced and as comfortable as ever.
Driving
Film unique, third-person driving shots with the Dual/Triple Suction Cup Car Mount, or mount the Action Invisible Selfie Stick for #RealLifeGTA shots straight outta San Andreas. In the edit, MultiView turns a single 360º shot into a split-screen effect without needing a multi-camera rig! It supports up to four views, so you can showcase different angles at the same time.
Editing - Shoot First, Frame Later
The best thing about 360º footage is that you can find the best angles after filming. This is known as reframing, and you'll quickly learn it's an important part of editing 360º footage. There are plenty of ways to edit and unlimited angles to choose from, but we'll quickly break down our favorite tools.
Insta360 Mobile App
If you're new to 360º or you're on the go, our free mobile app is packed with AI effects, templates, editing tools, and more for faster, quicker editing. We've completely revamped the mobile app to make it even easier. What a win.
- Export Without Editing
Skip reframing and export your footage immediately. Simply pick your view (forward or selfie) and you're done! Selfie View is perfect for motorcycling, skiing, and selfie videos. Just tap to export footage that makes you the star of the show. Forward View is best for motorcycling and cycling. Simply mount your camera and capture an immersive POV of the road ahead, then export your footage with one tap to relive the adventure again and again.
- Keyframes
If you want a more customized edit, tap the diamond icon on the Preview Page to add keyframes to your video. Keyframes tell the video where you want to look in your shot and fix the perspective to the one you choose. You can add multiple keyframes in your footage to show different perspectives and angles throughout your video and create seamless transitions between points.
Tip: Tap Dewarp on the Preview Page to remove the fisheye effect of 360º footage for a natural view of any angle.
- Record
For effortless editing, change the angle by moving your phone or swiping the screen. You can also choose the preset perspectives or add movements such as a spin for dynamic videos. When you're done, save and share your edits instantly—easy, fast, and seriously simple! There's also the option to take a Live Snapshot of a video and adjust the FOV with the magnifying glass.
- Editor
Editor is a brand-new interface with convenient ways to select and edit multiple segments. Try out screen recording, use the Frame Cut tool to pick out your favorite parts, or use Deep Track to center a subject. When you're done, tap 'Edit & Export' to add stats, speed, music, color, and more. Fancy going deeper? Hit 'More edits' and play around to your heart's content.
- AI Edit
AI Edit is the fastest method if you're short on time. AI analyzes your footage, chooses the highlights, and automatically edits them to create a binge-worthy clip. You can then export directly, pick a new template, or tap 'More Edits' for more effects.
- Shot Lab
Head to the Edit page in the Insta360 app and you'll find Shot Lab. This has a collection of creative viral video effects such as Sky Swap, AI Warp, and Fly Lapse. You won't be short on creativity here!
Tip: You can download footage from the camera while the Insta360app runs quietly in the background, leaving you free to use your phone for other tasks. The app will notify you when your footage is ready. You can also tap the download icon on the camera's album page to send and automatically download files to the Insta360 app.
Insta360 Studio - Free Desktop Editing Suite
Dive into the nitty gritty with our comprehensive desktop editing suite, allowing you to export videos in the clearest possible quality. With a simple interface and packed with features, Insta360 Studio is the easiest way for pros to create epic videos on a Mac or Windows computer.
- Edit multiple 360º videos on the same timeline and upload them directly to platforms that support 360° video playback, such as YouTube and TikTok. You can also view 360º footage on Apple Vision Pro.
- Edit and export cloud footage from Insta360+.
- H.265 means high-quality images in the same file size, and your reframed 8K videos will still maintain immense detail even once you've exported.
- Use Fade-In Fade-Out transitions for smooth transitions and avoid robotic movements.
- Use AI Stitching for the best results.
- If you're not satisfied with the sharpness or clarity, try using a slightly wider FOV.
- Add background music, text and, plug-and-play transitions with the media library.
Insta360 Reframe - Adobe Premiere Pro Plug-In
Use the Insta360 Reframe plug-in for Adobe Premiere Pro workflows. It ensures minimal exporting and maximum image quality without stitching:
- Directly import .insv files into Premiere without stitching first.
- Avoid quality losses due to multiple exports with proxy lrv files.
- Save time and complete your edit without leaving Premiere.
Just click the "Premiere Plug-in" button when installing Insta360 Studio.
Insta360+ Cloud Storage
Get the ultimate Insta360 experience with Insta360+, a cloud-based storage and editing service for 360º footage. Subscribe on the Insta360 app to enjoy auto backup, seamless 360º sharing, cloud editing and export, and more, all protected by AWS.
If you're looking for more in-depth tutorials to develop your 360º video shooting or editing skills, we recommend checking out @Best360 and @BenClaremont on YouTube. You can also check out the Insta360 Tutorials channel for further guidance.
Best Export Settings
Until you're ready to do the final export, always keep your files in the highest resolution and bitrate possible to ensure maximum quality. For the best stitching and noise reduction, we recommend exporting on Insta360 Studio:
- FlowState Stabilization is essential for most situations, so make sure to turn this on.
- Generally, there's no need for Color Plus, especially if you filmed in Vivid.
- For low-light shots, check Remove Grain to eliminate some of that noise.
- Check Chromatic Calibration if you notice any light/dark color differences in your footage.
- Turn on AquaVision 2.0 for more natural, true-to-life colors for underwater footage.
- Export in 4K ProRes and keep files in the highest bitrate to preserve details and color.
- Flat videos: Export in 4K resolution and use ProRes 422 LT encoding for efficient file size and quality.
- 360° videos: Export in the original footage resolution and use ProRes 422 LT encoding to preserve details and colors.
Export settings vary depending on the platform and other factors when posting to social media, but here's a rough guide for posting reframed (flat) videos to Instagram, YouTube, TikTok and Facebook:
Instagram:
Resolution: 1080x1350
Bitrate: 13-15Mbps
Codec: H.264
File Type: mp4
YouTube:
Resolution: 4K
Bitrate: 65-80Mbps
Codec: H.264 or H.265
File Type: mp4
TikTok:
Resolution: 1080x1920
Bitrate: 13-15Mbps
Codec: H.264
File Type: mp4
Facebook:
Resolution: 4K
Bitrate: 65-80Mbps
Codec: H.264
File Type: mp4
Well, we think we're all done here. Now, get out there and create some 360º magic with Insta360 X5, and remember to tag @insta360 on social media so we can check out your creations!
Keen to keep up to date on Insta360 stories? Keep an eye on our blog and sign up for our mailing list. Got a story to share? Email yours to communitystories@insta360.com and win up to US$50.


%20(1).svg)
%20(1).svg)
.svg)


