


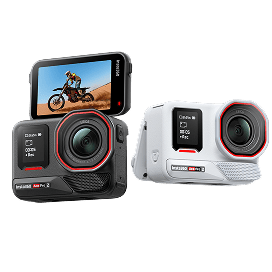


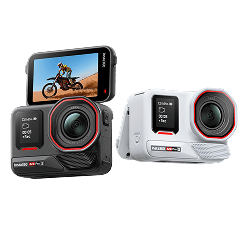


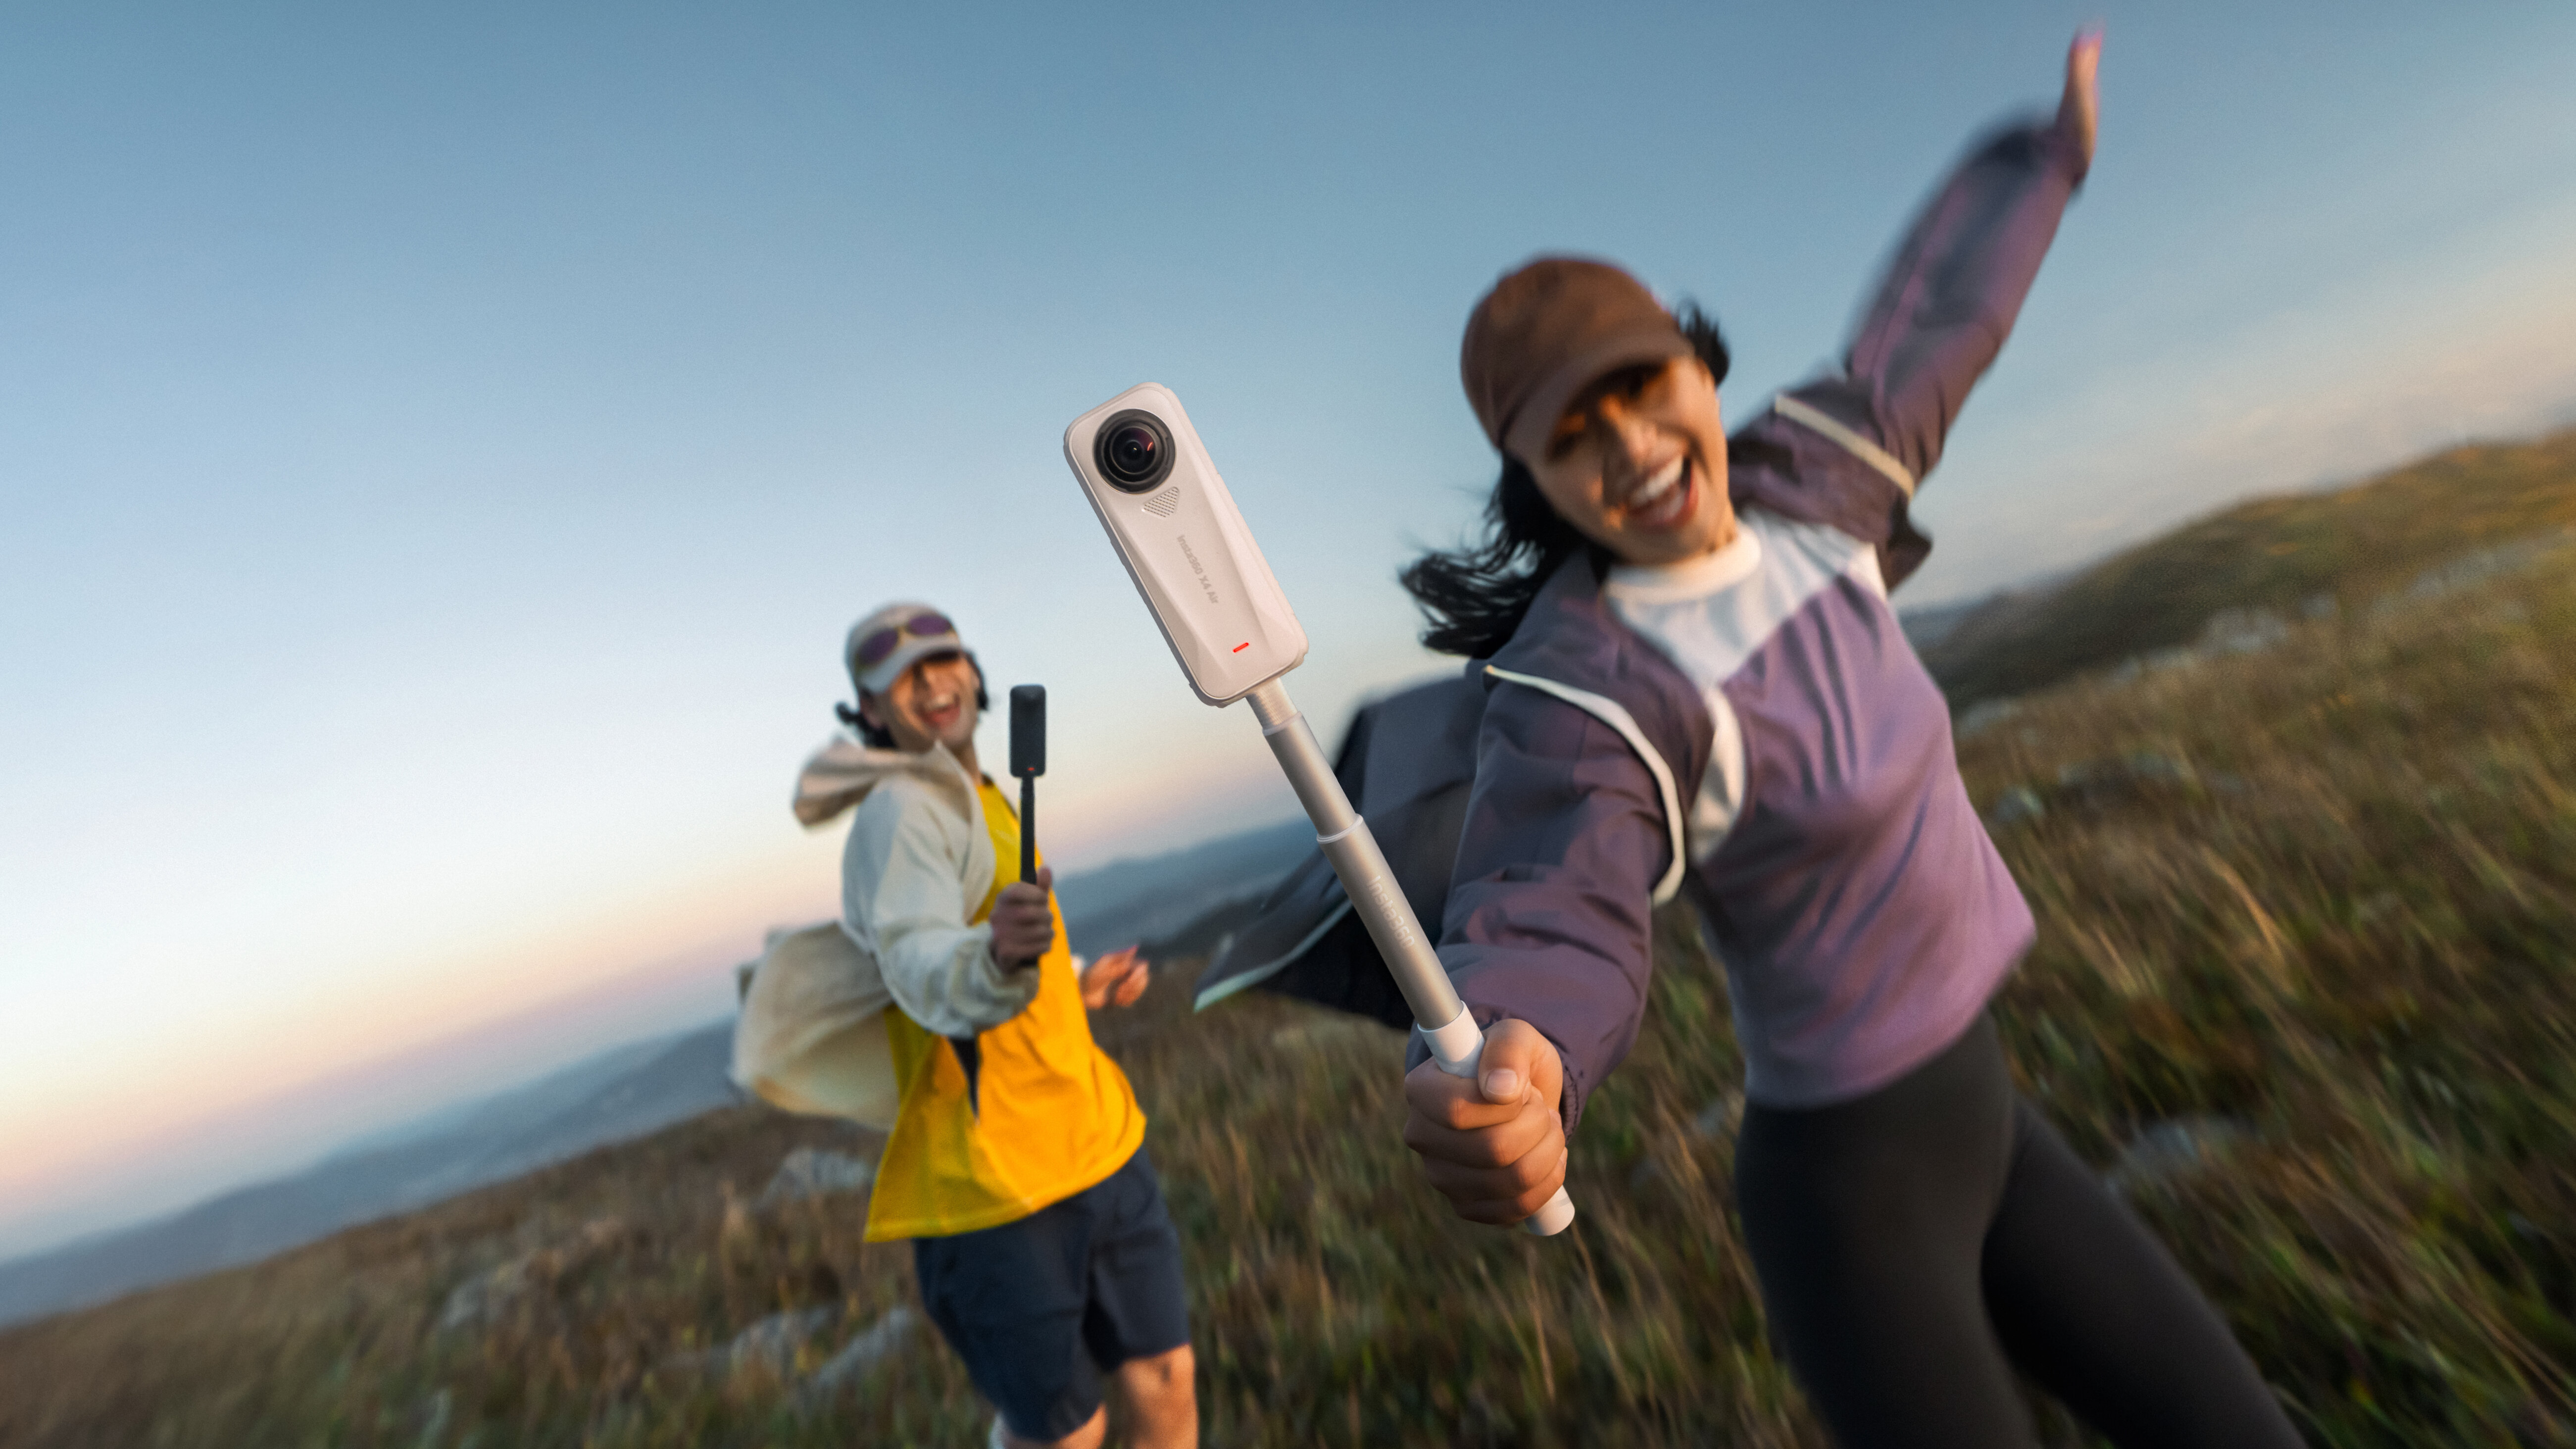


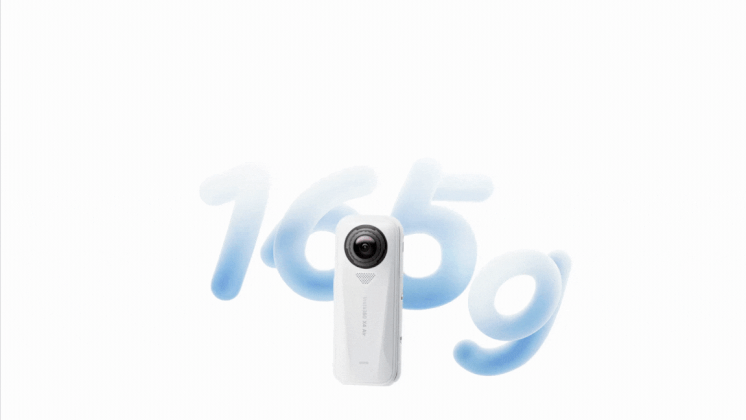
Picked up the pocket-sized Insta360 X4 Air? Boy, are you in for a treat. With 8K power packed into just 165g*, it's ready to capture every moment, big or small.
Whether you're traveling, vlogging, or heading into the great outdoors, this guide covers everything you need to know: setup, shooting tips, and export settings to make sure your footage looks its best.
Read on or jump directly to one of these sections:
Getting Started
Best Settings: 360 Mode
Best Settings: Single-Lens Mode
Shooting Tips
Settings for Every Scenario
Editing
Export Settings
If you're still deciding, check out how X4 Air measures up to its namesake X4 and the 360 goat X5.
Getting Started
Here's a quick checklist to run through before you start creating:
- Update the firmware, Insta360 app and Studio to the latest versions. You should receive a prompt in the app when these are available, or you can download them any time from the Insta360 official website.
- Customize the Quick and Lens buttons to have your favorite settings at your fingertips. Head to Settings > Customize Buttons.
- X4 Air's lenses are super tough and replaceable, so for the best image quality, we recommend using it without lens guards. But for more intense adventures (or just to be on the safe side), you can pick up the Standard or Premium Lens Guards. The camera automatically detects when they're installed or removed and adjusts the stitching algorithm for the best effect. They're not waterproof, though, so remember to take them off before taking a dip.
- Use the right type of SD card. We recommend picking up a memory card from our store or buying name-brand microSD cards, such as SanDisk, from official resellers.
- Remove stickers and clean the lens using a microfiber cloth or lens paper for clarity. You might notice a slight reddish tint on the lenses. Don't worry, it's an upgraded coating that boosts clarity and color. Your footage will look amazing, trust us.
Best Settings: 360 Mode
To unlock the full power of X4 Air, shoot in 8K30fps. This gives you incredible clarity while allowing flexible reframing later. This is best in outdoor daytime environments, so think beaches, sunny days, city streets with bright lights, clear skies, and so on.
Most of the time, your footage will look its best with these settings:
- ShootingMode: 8K30fps Video Mode
- AdaptiveTone:On
- ColorProfile: Standard
- Sharpness: Medium or Low
- Bitrate: Set to High for the best image quality or Standard for a smaller file size
- ShutterSpeed: Auto
- ISO: Auto
Tip: Recording in 8K requires serious power, and it's totally normal for X4 Air to get a bit warm. To keep things running smoothly, shoot in open, airy spots, lower the resolution or reduce clip length, and avoid charging while recording for long stretches.
You can also drop down to 6K30fps and 4K50fps if you don't need such high specs. If you're shooting in strong light or backlit environments, enable Active HDR for more natural transitions between light and dark and better dynamic range. This is available up to 8K30fps.
Shooting at night or indoors? Try Auto Mode with Low Light Stabilization or Motion Blur Reduction for smooth, bright shots. If you want to go more hands-on, manually adjust your shutter faster than 1/100s and ISO between 100–800 for the best balance. You can take a few practice shots before the real thing to make sure it looks exactly how you want it to.
For selfies, group photos, or talking head videos, switch on Portrait Mode. This mode intelligently recognizes faces, brightens skin, softens texture, and preserves details for flawless selfies, every time. Nice.
360 Photos
Freeze any moment with an epic 360 photo. Try capturing moments or angles with a cool "2-in-1 perspective". This is only possible with 360 cameras!

InstaFrame Mode - Two Videos in One
InstaFrame Mode records a perfectly framed, instantly shareable flat video up to 1080p30fps with no editing or reframing needed, as well as a full 360 video up to 6K30fps at the same time.
Film in InstaFrame Mode and choose from a Fixed View or a Selfie View:
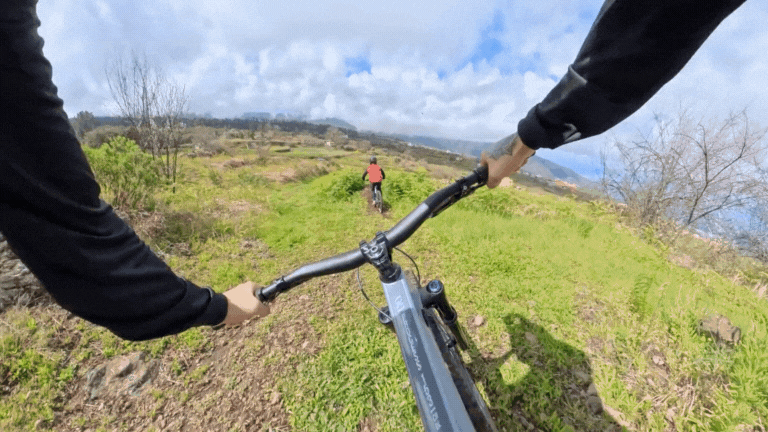
- Fixed View follows the same perspective throughout the video. You can choose between forward, back, top, and bottom views, or choose "Custom View" and drag the screen to find the direction you want to follow. This option is ideal when the camera is mounted on a motorcycle or bike.
- Selfie View automatically identifies and tracks the nearest subject throughout the video.
The 360 video then offers the flexibility for you to revisit unexpected moments from every angle. You can check both videos in your camera's album.
Tip: Pick up with Mini Remote to adjust the angle from a distance when filming in InstaFrame Mode. Press it twice to switch between Fixed and Selfie View, and three times for a 360 spin or barrel roll.
Best Settings: Single-Lens Mode
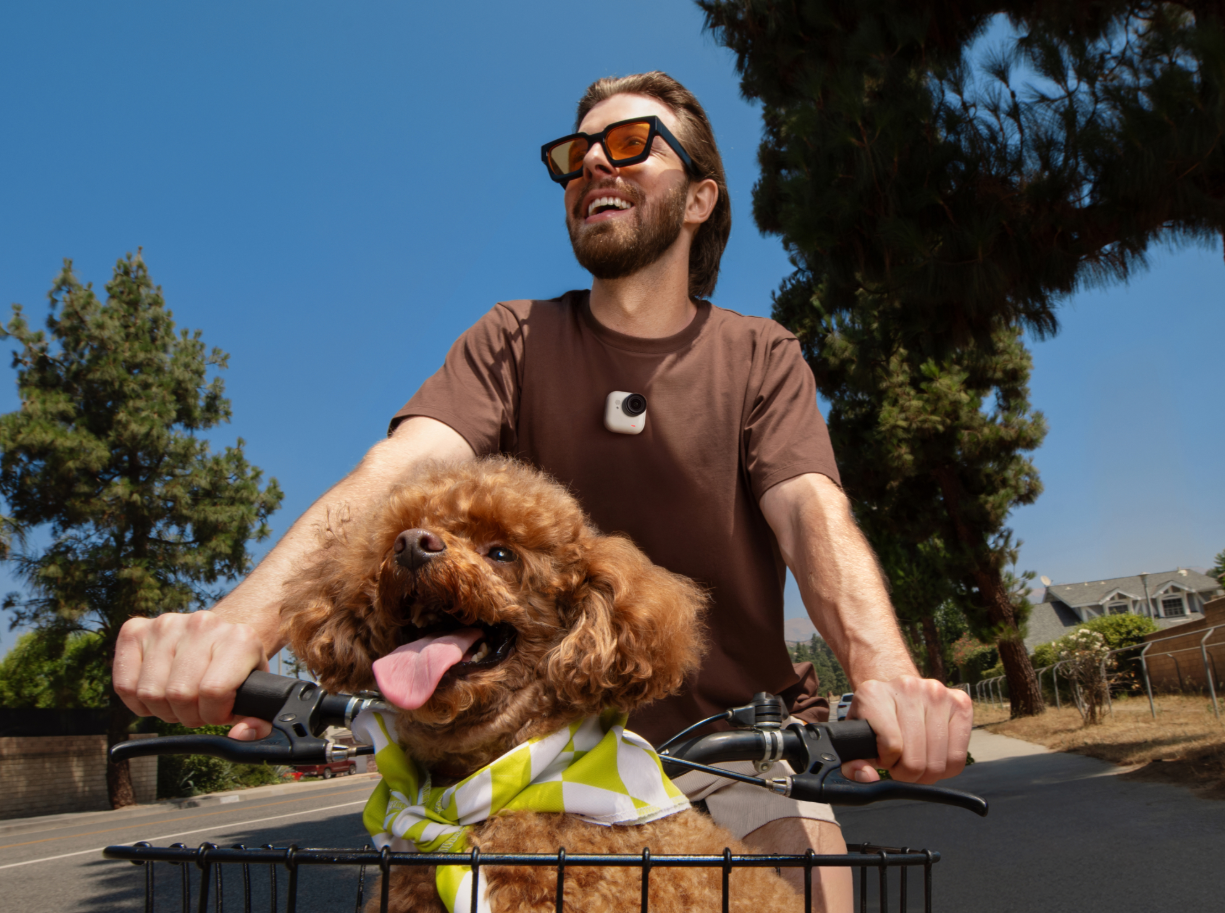
Not just 360, baby! Mount X4 Air onto your chest, handlebars, or helmet and film in Single-Lens Mode for super smooth 4K60fps POVs. It films with one lens, so that means no reframing, no quality loss in the edit, and no need for any other wide-angle camera. This also looks best in bright lighting.
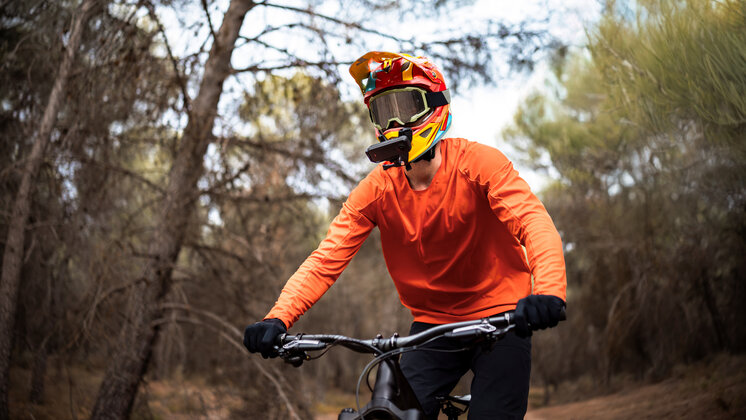
Tip: All Single-Lens Mode videos now sport an ultra-wide 170° field of view.
Me Mode
Using the Invisible Selfie Stick, Me Mode films a wide-angle video up to 4K30fps that keeps you centered throughout, a bit like a regular point-and-shoot camera.
Dial down the resolution and up the frame rate to 1080p120fps for 4x slow-mo shots with in-camera stitching and ready-to-share .mp4 files.
Tip: Tap the button on the camera's touchscreen to flip the lens and film someone else.
Shooting Tips
If you're new to 360, here are some basic tips to get the cleanest shots from day one. It might take a few rounds as you get used to where the stitch line is, but these tips should help you avoid awkward lines or distortion.
Stitching
X4 Air has two fisheye lenses, which means there's a stitch line where the footage is combined into one image. Insta360 cameras process the stitch line in real time using our Emmy® Award-winning 360 video stitching algorithm, but you can also help to make the stitch line less obvious in your footage:
- Avoid placing main objects on the side of the camera.
- Don't rotate the camera while shooting. It's easier for the stitching algorithm to align the footage when your camera is in a fixed position.
- Don't get too close to the camera and try to keep a distance of around 2.5ft (80cm).
- Select an angle where the stitch line is less obvious when reframing your footage to a flat video.
Exposure and Color Differences
It's important to manage exposure so that there are no color differences between the two lenses. Auto exposure settings are your best bet for keeping exposure balanced. We also have a clever feature that balances exposure from each lens for you: AdaptiveTone.
By independently recording light data for both lenses, AdaptiveTone automatically balances exposure and adjusts brightness and color, making skies bluer, details sharper, and light transitions smoother, delivering cinematic, ready-to-share footage straight from the camera.
Tip: If your shot includes any bright light sources, try to have the side of the camera facing the light rather than one of the lenses. Pay attention to the position of the sun and adjust your shooting angle to avoid glare.
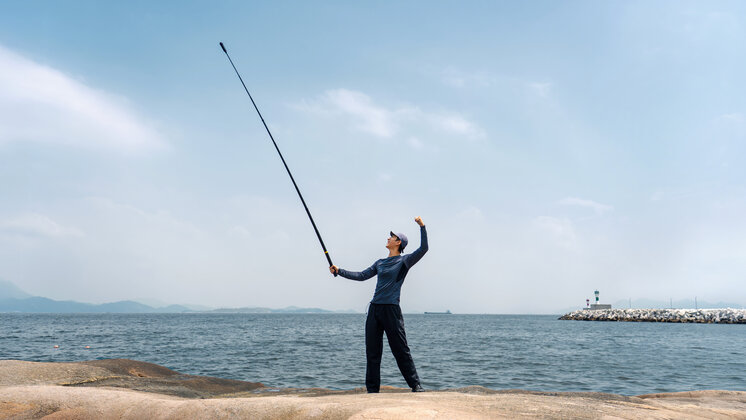
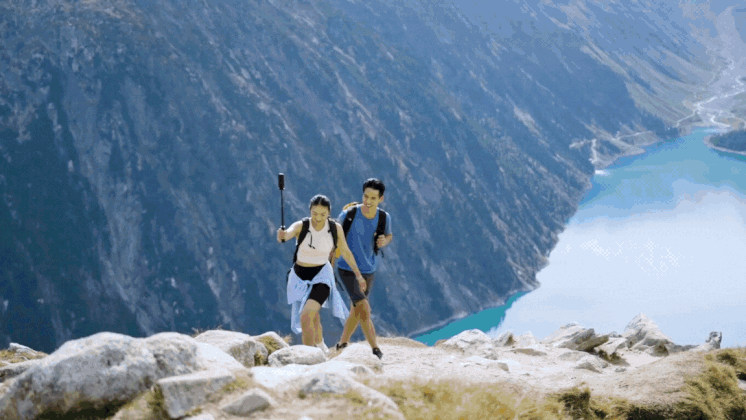
Invisible Selfie Stick
The Invisible Selfie Stick is an awesome way to capture memories of you, your mates, and all your surroundings without the pole in the shot. That means mind-blowing third-person follow shots even if you're traveling solo. The Extended Edition Selfie Stick is perhaps our fave to date. It extends to just under 10ft (3m) for sweeping aerial perspectives and great creative possibilities. No drone, no problem.
When it comes to selfie sticks, however, we've got every colour, length and model you could dream of. Check out our handy guide to see which is right for you. Once you've decided, check out our tips and tricks on how to use it.
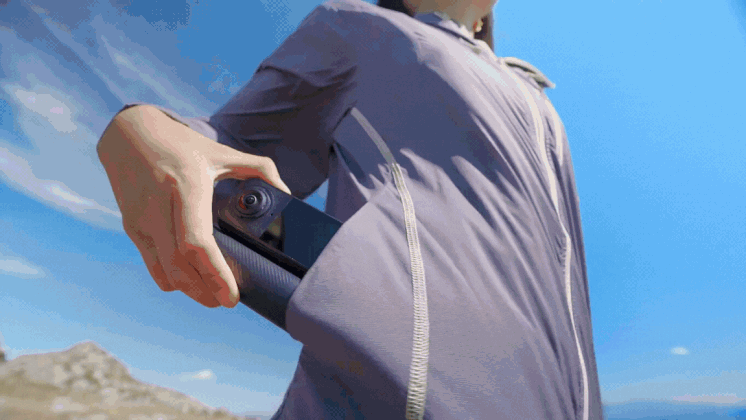
Replaceable Lenses
X4 Air's lenses are fully replaceable with the handy Replacement Lens Kit, so you can easily swap out damaged lenses on the go.
We've got a full tutorial on how to use them, but we recommended replacing the lenses in a clean indoor environment to prevent the lenses from collecting dust. Try not to replace the lenses when the humidity is over 60% or outdoors to prevent the lenses from fogging.
Tip: Place a lens cloth under the camera to avoid scratching the lens.
Settings for Every Scenario
With the right accessories and a few pro tips, you can capture cinematic, social-ready footage in virtually any environment. Here are some tailored tips to help you capture the best footage. Find your flavour or read them all.
Traveling & Vlogging
X4 Air fits into any backpack, carry-on, or jacket pocket, making it perfect for filming city streets, landscapes, or spontaneous moments on the fly.
The Foldable 2-in-1 Selfie Stick, which folds down to under 17cm, doubles as a tripod, flipping out in seconds for instant shooting and folding down for easy storage on the go.
The Extended Edition Selfie Stick stretches up to 3 meters and disappears completely in 360 footage, letting you hover above a scene or get close to the action for dramatic perspectives without worrying about no-fly zones.
For creative sequences, experiment with a Timelapse or TimeShift to capture sunsets, bustling streets, or changing landscapes.

To keep audio crisp on the move, the ultralight Insta360 Mic Air records audio directly to the camera from up to 300 meters away, staying out of sight while putting your voice front and center.
Tip: Enable Voice Enhancement when vlogging to highlight your voice over background noise.
Motorcycling
For motorcyclists, X4 Air's versatile accessory ecosystem makes it easy to capture forward-facing POVs, steady on-board shots, or third-person angles without weighing you down. For steady third-person shots, try the Motorcycle U-Bolt Mount. Capture onboard shots with the Chest Strap, or get a real rider's perspective with the Helmet Mount Kit. The All-Weather USB Charging Cover is a handy accessory to charge as you record in rainy weather.
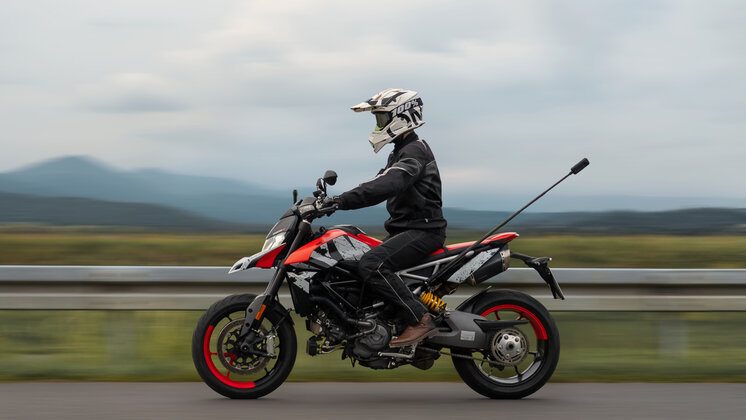
With Bluetooth headset compatibility for SENA, Cardo, and other leading brands, you can record crystal-clear audio hands-free. Use Auto Wind Noise Reduction - Strong to reduce wind interference when riding at high speeds.
Road Mode ensures smooth rides by automatically deleting the oldest footage once your storage limit is reached, while Plate Blur protects privacy by hiding license plates in your recordings. For cinematic flair, the new Immersive Shake stabilization preserves natural tilts and motion, giving a sense of speed and terrain without making footage jarring.
If your X4 Air is mounted out of reach, control it with AI-powered Gesture Control. This works from all angles, even when you have gloves and a helmet on, so you don't need to stop and pull over:
- Palm up: start/stop recording
- Peace sign: take a photo.
Biking
Lightweight mounts and hands-free control allows you to pedal harder without worrying about the camera. The Ring Remote lets you control X4 Air while keeping your hands on the handlebars. For even more control, the GPS Preview Remote lets you overlay stats and acts as a control center from your wrist or handlebars. Even if you have X4 Air mounted out of reach, you'll be able to preview your shots in real time.
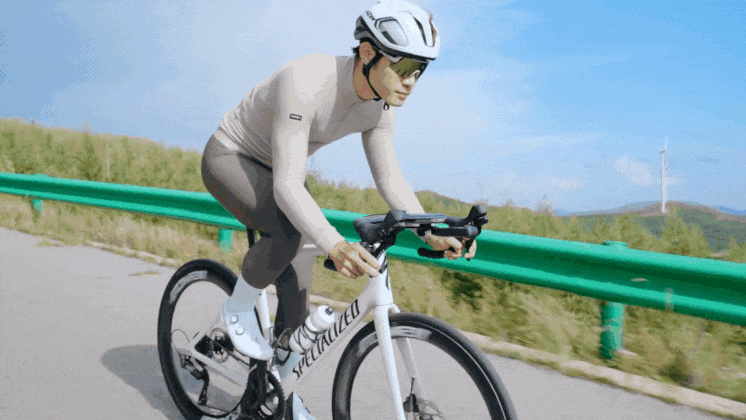
For immersive POVs, try the Bike Headset Cap Mount, Helmet Mount, or the POV Chest Mount, which sports a close-to-body design for extra stability during high-intensity action. For third-person angles, try the Third-Person Handlebar Mount or Action Invisible Selfie Stick.
In the edit, Motion ND adds cinematic motion blur without an ND filter. Just tap Motion ND in the Insta360 app or Studio for a real sense of speed as you race down tracks and roads.
The custom Stats Dashboard provides immersive, data-driven videos. Overlay real-time metrics such as speed, distance, or altitude from Garmin devices, Apple Watch, or directly via the Insta360 app.
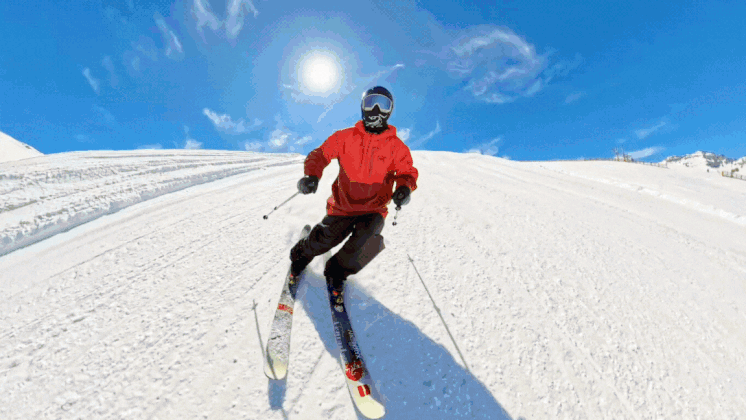
Winter Sports
X4 Air is perfect for winter adventures thanks to rugged, cold-weather-ready design. It's built to endure temperatures as low as -4ºF (-20ºC) and remains waterproof for snowy and icy conditions, so your footage stays smooth no matter how intense your run.
When it comes to accessories, X4 Air won't leave you out in the cold. Mount the durable Action Invisible Selfie Stick onto a ski pole or simply hold it for third-person shots while you shred.
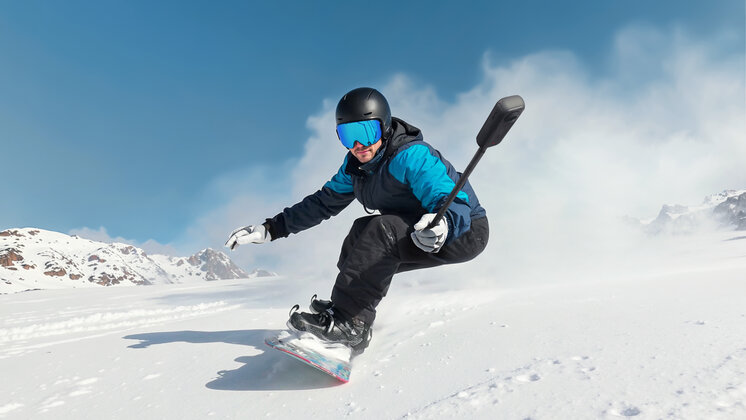
Tip: Use Me Mode and the Action Invisible Selfie Stick to analyze and improve your technique on the slopes. Not just a pretty camera, eh?
The new Twist to Shoot feature is a real winner when you're kitted out in thick winter gear. Simply rotate your selfie stick back and forth twice to start/stop filming or take a photo.
Hiking & Outdoors
For hiking and trekking, X4 Air is a trusty companion. Attach it to a backpack strap or use the Magnetic Selfie Stick Holster to keep it ready for spontaneous shots but out the way when you don't need it. Use the Foldable 2-in-1 Selfie Stick as a tripod for timelapses, capturing sunrises, cloud movements, or stunning landscapes along the trail.
Tip: Combine slow, deliberate pans with sweeping selfie stick movements to produce cinematic shots around landmarks, waterfalls, or viewpoints.
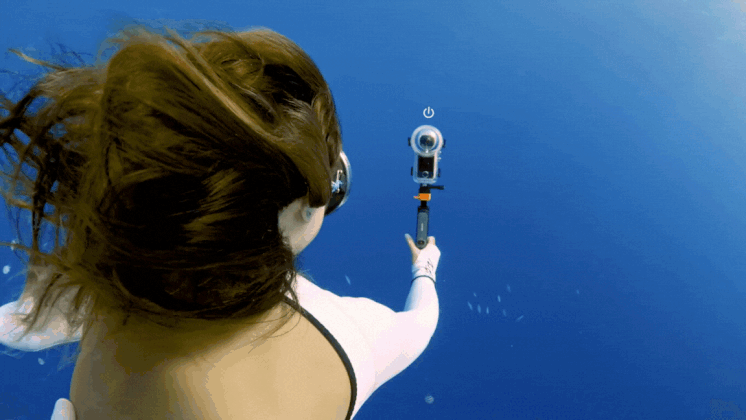
Water Sports
While X4 Air is waterproof to 49ft (15m) straight out of the box, we recommend using the Invisible Dive Case for any underwater exploration. It keeps X4 Air waterproof to 197ft (60m) and accounts for light refraction, warping, and distortion that makes stitching more difficult than on land.

The dive case's unique structure provides seamless underwater stitching and stays 100% invisible in your shots. Paired with the Invisible Selfie Stick, you can get third-person shots that are impossible to achieve with any other camera! Try to keep the dive case and selfie stick in a straight line and turn on Dive Case Mode. Just swipe down on the touchscreen, and you'll see the icon.
For more control, the Underwater Selfie Stick with Remote has a handy waterproof remote to start/stop recording and switch shooting modes with a click.
When using X4 Air in the water:
- Firmly close the USB port and battery cover to guarantee waterproofing. The orange marks should not be visible.
- After using it underwater, allow it to fully air dry and the mic will be business as usual after 24 hours.
- Turn on AquaVision 3.0 in the Insta360 app or Studio to auto-balance colors and remove that blue haze from your underwater shots.
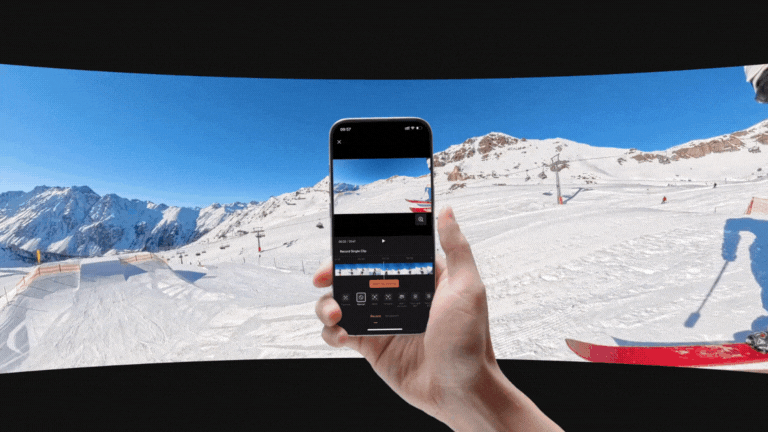
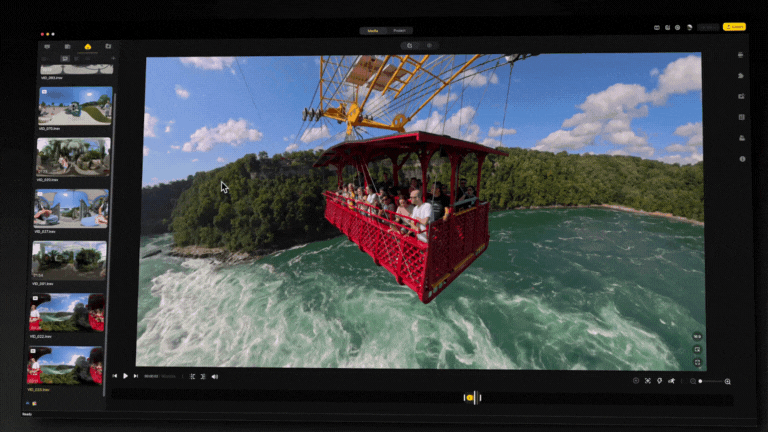
Editing: Shoot First, Frame Later
Reframing allows you to find the best angles after filming, and is an important part of editing 360 footage. While having every angle to play with is one of the most exciting reasons to own a 360 cam, it can sound daunting to beginners. Luckily, we have tons of editing tools that make it easy to create dynamic footage. Here are our faves.
Insta360 Mobile App
Our free mobile app is packed with AI effects, templates, editing tools, and more for faster editing. Simple, easy to use, and right there in your pocket whenever inspiration strikes.
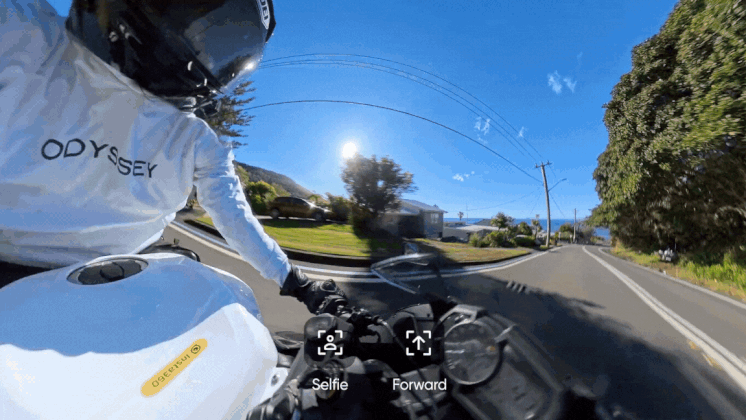
- Preset Perspectives
Choose between a forward or selfie view, and... that's it. Selfie View is perfect for motorcycling, skiing, and selfies when you want to be the star of the show. Forward View is best for motorcycling and cycling for an immersive POV of the road ahead. If you really can't decide, AI Frame finds the best view for you.
- Keyframes
For a more customized edit, tap the diamond icon on the Preview Page to add keyframes to your video. Keyframes tell the video where you want to look in your shot and fix the perspective to the one you choose. You can add multiple keyframes in your footage to show different perspectives and angles throughout your video and create seamless transitions between points.
Tip: Tap Dewarp on the Preview Page to remove the fisheye effect for a natural view of any angle.
- Record
Perhaps the fastest (and funnest) way to edit. Move your phone or swipe the screen to change the angle. You can also choose preset perspectives and add dynamic movements such as a 360 spin. When you're done, save and share your edits instantly. There's also the option to take a Live Snapshot of a video and adjust the FOV with the magnifying glass.
- Editor
Editor is a brand-new interface with convenient ways to select and edit multiple segments. Try out screen recording, use the Frame Cut tool to pick out your favorite parts, or use Deep Track to center a subject. When you're done, tap 'Edit & Export' to add stats, speed, music, color, and more. Fancy going deeper? Hit 'More edits' and play around to your heart's content.
- Auto Edit
Auto Edit is the fastest method if you're short on time. AI analyzes your footage, chooses the highlights, and automatically edits them to create a binge-worthy clip. You can then export directly, pick a new template, or tap 'More Edits' for more effects.
- Shot Lab
Head to the Edit page in the Insta360 app and browse through our collection of creative viral video effects such as Sky Swap, AI Warp, and Fly Lapse.
Tip: You can download footage from the camera while the Insta360 app runs quietly in the background, leaving you free to use your phone for other tasks. The app will notify you when your footage is ready. You can also tap the download icon on the camera's album page to send and automatically download files to the Insta360 app.
Insta360 Studio - Free Desktop Editing Suite
Our comprehensive desktop editing suite allows you to export videos in the clearest possible quality. With a simple interface and pro features for full creative control, Insta360 Studio is the easiest way to edit on a Mac or Windows computer.
- Edit multiple 360 videos on the same timeline and upload them directly to platforms that support 360 video playback, such as YouTube and TikTok. You can also watch 360 footage on your Apple Vision Pro.
- Edit and export cloud footage from Insta360+.
- H.265 means high-quality images in the same file size, and your reframed 8K videos will still maintain immense detail even once you've exported.
- Use Fade-In Fade-Out transitions for smooth transitions and avoid robotic movements.
- Use AI Stitching for the best results.
- If you're not satisfied with the sharpness or clarity, try using a slightly wider FOV.
- Add background music, text and, plug-and-play transitions with the media library.
Insta360 Reframe - Adobe Premiere Pro Plug-In
Use the Insta360 Reframe plug-in for Adobe Premiere Pro workflows. It ensures minimal exporting and maximum image quality without stitching:
- Directly import .insv files into Premiere without stitching first.
- Avoid quality losses due to multiple exports with proxy lrv files.
- Save time and complete your edit without leaving Premiere.
Just click the "Premiere Plug-in" button when installing Insta360 Studio.
Insta360+
Get the ultimate Insta360 experience with Insta360+, a cloud-based storage and editing service for 360 footage. Subscribe on the Insta360 app to enjoy auto backup, seamless 360 sharing, cloud editing and export, and more, all protected by AWS.
If you're looking for in-depth shooting and editing tutorials, we recommend @Best360 and @BenClaremont on YouTube. You can also check out the Insta360 Tutorials channel for further guidance.
Best Export Settings
Until you're ready to do the final export, always keep your files in the highest resolution and bitrate possible to ensure maximum quality. For the best stitching and noise reduction, we recommend exporting on Insta360 Studio:
- FlowState Stabilization is essential for most situations, so make sure to turn this on.
- Generally, there's no need for Color Plus, especially if you filmed in Vivid.
- For low-light shots, check Remove Grain to eliminate some of that noise.
- Check Chromatic Calibration if you notice any light/dark color differences in your footage.
- Turn on AquaVision 3.0 for more natural, true-to-life colors for underwater footage.
- Export in 4K ProRes and keep files in the highest bitrate to preserve details and color.
- Flat videos: Export in 4K resolution and use ProRes 422 LT encoding for efficient file size and quality.
- 360 videos: Export in the original footage resolution and use ProRes 422 LT encoding to preserve details and colors.
Export settings vary depending on the platform and other factors when posting to social media, but here's a rough guide for posting reframed (flat) videos to Instagram, YouTube, TikTok and Facebook:
Instagram:
Resolution: 1080x1350
Bitrate: 13-15Mbps
Codec: H.264
File Type: mp4
YouTube:
Resolution: 4K
Bitrate: 65-80Mbps
Codec: H.264 or H.265
File Type: mp4
TikTok:
Resolution: 1080x1920
Bitrate: 13-15Mbps
Codec: H.264
File Type: mp4
Facebook:
Resolution: 4K
Bitrate: 65-80Mbps
Codec: H.264
File Type: mp4
Well, that's it from us. Now, get out there and make some magic with Insta360 X4 Air. Remember to tag @insta360 on social media so we see what you've created!
*Actual weight may vary slightly depending on configuration and production.
Keen to keep up to date on Insta360 stories? Keep an eye on our blog and sign up for our mailing list. Got a story to share? Email yours to communitystories@insta360.com and win up to US$50.


%20(1).svg)
%20(1).svg)
.svg)


