


.jpg)


Are you tired of reeling in the big one without proof to back up your fish tale? Well, fear not, fellow angler. Today, we're digging deep to learn about fishing cameras and how to mount them to help you capture those epic moments hook, line, and sinker.
Grab your gear, bait your hook, and let's get into the depths of fishing photography with the best angling angles around.
How to Use Your Underwater Fishing Camera?
So, you've got your hands on a sweet camera for fishing and you're ready to start. But what exactly is a fishing camera? Simply put, it's a specialized camera designed to be used underwater while fishing, allowing you to capture all the action beneath the surface. And when it comes to the crème de la crème of fishing cameras, Insta360 X3 reigns supreme.
With its impressive battery life, waterproof design, and 360º video capture capabilities, this bad boy is ready to tackle any underwater challenge you throw its way. So, say goodbye to blurry fishy photos and hello to crystal-clear snapshots of your most excellent catches.
Before you start snapping pics, let's run through how to get your fishing camera set up and ready to roll.
1. Choose the Right Location
First off, location is vital. You wanna choose a spot in the water where the action is happening. Think of it as picking the best seat at the movies—you want to be front row center for all the action.
2. Install a Mounting Bracket or Fixture
Next, you must install a mounting bracket or fixture for your fishing camera. It's like giving your camera its own cozy little spot to chill while it works its magic. Make sure it's secure and sturdy so it doesn't go for an unexpected swim.
3. Waterproof Precautions
Now, let's talk waterproofing. You wouldn't want to take your phone for a swim without a waterproof case, right? The same goes for your fishing camera. Double-check those seals and make sure everything's watertight before you plunge.
4. Adjust the Viewing Angle
Once your camera's all snug in its mount, it's time to adjust the viewing angle. You want to ensure you capture all the action, so play around with the angle until you find the sweet spot.
5. Power and Battery
Power up, baby! Don't forget to hook your fishing camera up to its power source and make sure the battery's juiced up. You don't want to miss moments because your camera decided to nap.
6. Test and Calibrate
Now, before you start snapping away, give your fishing camera a test run and calibrate it if needed. It's like making sure your GPS is working before you hit the road—you want to make sure everything's running smoothly before you embark on your underwater adventure.
7. Connect Monitoring Devices
Last but not least, connect any monitoring devices you wanna use. Whether it's your phone or a fancy monitor, having a live feed of what your underwater fish camera is seeing can help you nail that perfect shot.
How to Mount Your Camera for Underwater Fishing? A Step by Step Process
Let's learn the art of mounting your underwater camera for fishing like a pro. Whether you're using an Insta360 X3 or another underwater wonder, we've covered you with a step-by-step guide to get your camera in prime position for those fin-tastic shots.
Step 1: Choose Your Spot
Whether you're fishing from the shore, a boat, or even an underwater drone, scout out the best location to capture those epic underwater moments.
Step 2: Get Your Gear
Now that you've scoped out your spot, it's time to grab your gear depending on the angle and shot you want. For Insta360 X3, you've got a few options to choose from:
- Chest Strap: This bad boy is perfect for getting those first-person shots. It's comfortable, adjustable, and gives you a hands-free way to capture all the action.
- Mount Mount: Want a POV shot that captures everything you see? This mount is your go-to. Just pop it in your mouth and get ready to reel in some epic footage.
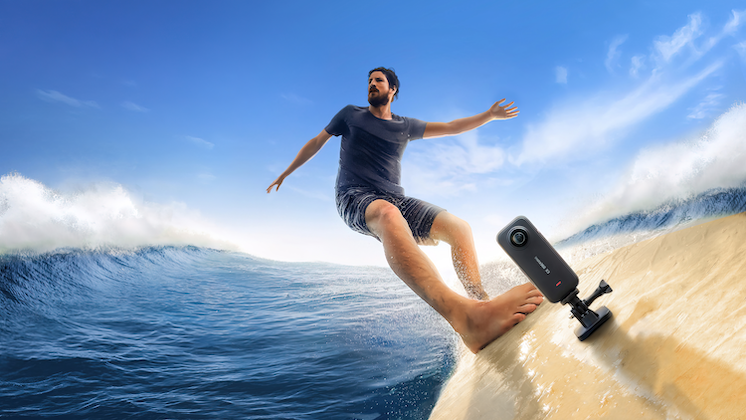
- Invisible Selfie Stick: This selfie stick is your best friend when you're on a fishing boat and want to capture those third-person angles. It's lightweight, portable, and gives you the perfect vantage point for all your fishing adventures. Plus, it automatically disappears from your shot, just like magic!
- Dive Case: The dive case is a must-have for those extra deep dives. Add your camera inside, hook it onto your fishing rod, and prepare for unobstructed 360º shots. Plus, it adds an additional layer of waterproofing to your X3 so that you can fish with better peace of mind.
Step 3: Mount Your Camera
Once you've got your gear sorted, it's time to mount your fishing camera. Whether using a chest strap, mouth mount, selfie stick, or dive case, ensure it's secure and sturdy before you take the plunge. You don't want to risk losing your camera to the depths below.
Step 4: Adjust Your Angle
Now that your camera's all setup, it's time to adjust your angle. Play around with the positioning until you find the perfect shot. Whether you're going for a first-person perspective, a POV shot, or a third-person angle, make sure you capture all the action in the frame.
Step 5: Test It Out
Before you start snapping away, give your setup a test run. Make sure everything's working correctly and that you're happy with the footage. You don't want to miss out on any epic shots because of a technical glitch.
Step 6: Dive In!
Now that you're all set up and ready to go, it's time to dive in and capture some epic underwater footage. Whether you're reeling in the big one or just enjoying a leisurely day on the water, your fishing camera is sure to capture all the action in style.
How to Get the Best Shots?
.jpg)
Let's talk about how to reel in those epic shots with your fishing camera, especially if you're rocking Insta360 X3. Here’s some tips and tricks to help you make a splash with your footage.
1. Choose a High Resolution
Take it from the beginning; let's talk settings. When using Insta360 X3, you want to make sure you're shooting in high resolution for those crisp, clear shots. We're talking 5.7K30fps. And don't forget to dial up the Vivid color profile and keep the sharpness at Medium. You want those colors to pop like fireworks on the Fourth of July.
2. Capture Unique Moments with 360º Video
Now, here's where things get really amazing. With Insta360 X3, you've got the power to capture those one-of-a-kind moments in glorious 360º video. That's right; you can literally capture everything happening around you from every angle imaginable. It's like having your own personal fish-eye lens.
3. Pre-Recording:
But wait, it gets even better with Pre-recording. Picture this: you're out on the water, patiently waiting for the fish to bite. Suddenly, you feel a tug on your line, and the adrenaline starts pumping, but oh no! You forgot to turn your camera on. With Pre-recording, you can capture 15 or 30 seconds of footage before you even hit the Shutter Button. You won't miss a single second of the action. It's like having a rewind button for your fishing adventures.
4. Pay Attention to Composition and Angles
Now, let's talk composition and angles. For the best stitching in your 360º footage, try to avoid having one lens facing the surface. You want a seamless blend of shots that'll make your viewers feel like they're right there with you, underwater and all.
5. How to Get Perfect Stitching
When setting up your shots, remember this golden rule: avoid having just one lens facing the water's surface. This simple tip ensures seamless stitching for professional-looking footage. Think of it like piecing together a puzzle—you want all the angles to fit snugly. So, get creative with your camera positions to capture every angle of the action. Your viewers will appreciate the smooth, uninterrupted visuals.
6. Ensure there is Adequate Lighting
And speaking of underwater, lighting is vital. Make sure you've got plenty of natural light to work with or consider bringing along some underwater lighting to really make your footage pop.
7. After Shooting
Once you've captured your epic shots, it's time to give them a little TLC with AquaVision 2.0. This nifty feature in the Insta360 app helps remove that pesky blue haze that can sometimes creep into underwater footage. It's like giving your footage a spa day‚ it'll come out refreshed and ready to impress.
Read more underwater shooting tips here.
Gone Fishing
So, there you have it, people - you're now equipped with all the know-how to mount your fishing camera like a seasoned pro. With the right gear, a dash of creativity, and a sprinkle of ingenuity, you'll reel in those epic shots faster than you can say, "I’ve caught one!" So grab your Insta360 X3, find your spot, and get ready to capture those fin-tastic moments like never before.
Keen to keep up to date on Insta360 stories? Keep an eye on our blog and sign up for our mailing list.


%20(1).svg)
%20(1).svg)
.svg)


