


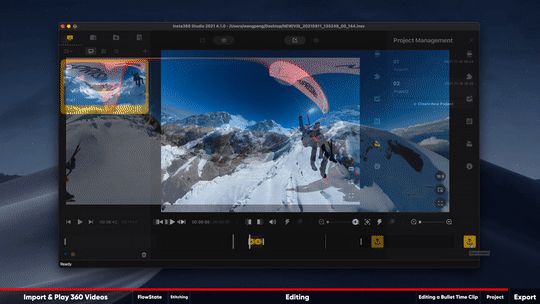
Insta360 Studio 2021 Tutorial
-
- Contents
- 1. Play 360° Videos
1.1 Preview 360° videos
1.2 Stitching effects & optimization settings
-
- 2. FreeCapture
2.1 Determine your edit
2.2 Add keyframes
2.3 Set transitions between keyframes
-
- 1. Play 360° Videos
-
1.1 Preview 360° videos
- Open Insta360 Studio 2021.(Example is a 5.7K video shot on ONE X2)
- You can preview the footage in the thumbnail within the file window.(Note: thumbnail preview requires the corresponding LRV file)
- The Footage Panel is displayed by default. Click “Window” on the top menu bar to customize the panels displayed.
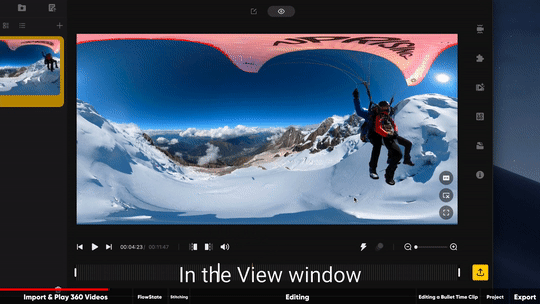
- In the View window, you can preview different perspectives such as Fisheye, Tiny Planet, Crystal Ball, Natural View and Flat.
-
-
1.2 Stitching effects & optimization settings
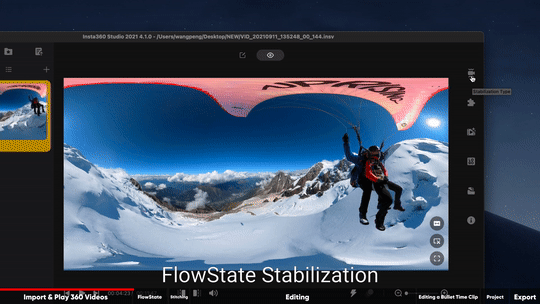
- You can toggle on and off FlowState Stabilization and Direction Lock. FlowState Stabilization is turned on by default to make it easier to set keyframes with FreeCapture. (If you turn on Flowstate during or after your edit, your video will re-render and angles will change)
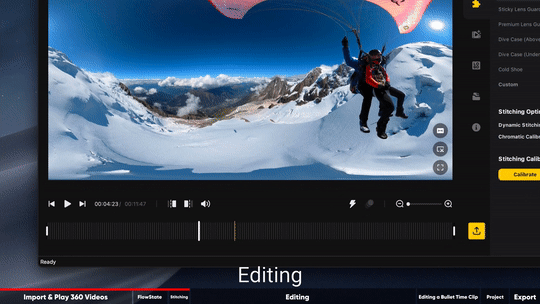
- Make sure to adjust the stitching settings if your footage was shot using a lens guard or case. If you’re not happy with the stitching, select a reference frame to apply stitching calibration to the clip.
-
-
- 2. FreeCapture
-
2.1 Determine your edit
- Set a start and end point for your video. Then, click “FreeCapture” to start your edit.
- You are free to adjust the aspect ratio. The default is 16:9.
-
-
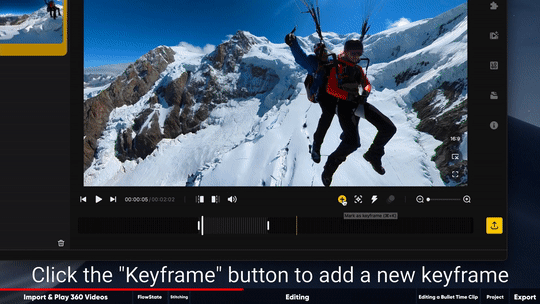
2.2 Add keyframes
- Use keyframes to customize the pan, tilt, FOV and distance for any frame in your clip.
- Drag to get the angle you want. Or manually set parameters in the keyframe window.
- To readjust a keyframe, click the icon to open the window.
-
-
-
2.3 Set transitions between keyframes
- Set transitions between keyframes and choose from multiple effects. Try changing the perspective here if desired, for example to a Tiny Planet.
-
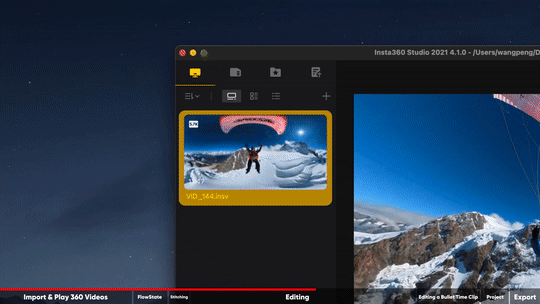
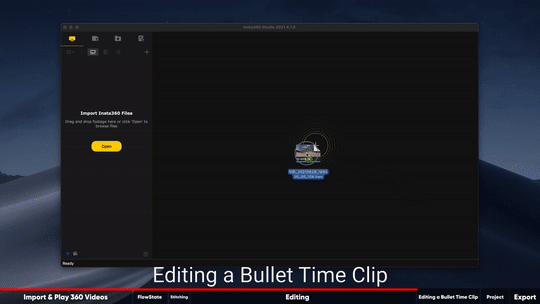
3. Edit Bullet Time Videos
- Import a Bullet Time file, then set a start and end point for your video. Adjust the FOV and distance settings as desired.
- Select the aspect ratio.
- Bullet Time videos do not support FreeCapture, and FlowState Stabilization must be turned on.
- Remember to adjust the stitching settings if your footage was shot using a lens guard or case. And if you're unsatisfied with the stitch, you can select a reference frame to apply a stitching correction.
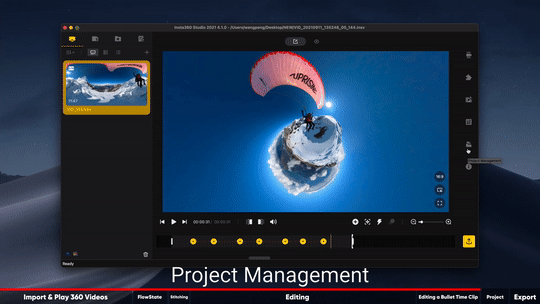
4. Project Management
- Before exporting the video, you can save different edits. Select ‘Project Management’, click 'Add Project’ to create an unedited version of the original file. Save the previous edit and start working on a new version.
- Select settings and storage location, then export. Alternatively, click ‘Add to Queue’ to export all the videos later in one go.
-
-
5. Computer configuration requirements
Click here to view Insta360 Studio 2019 Tutorial.Computer type Windows Mac Operating system Windows 7 sp1 or higher macOS 10.13 or higher Processor Any AMD or Intel mainstream processor within the last 2 years Mainstream model within the last 2 years RAM 16GB or higher Mainstream model within the last 2 years Main Hard Disk SSD 128GB or higher Mainstream model within the last 2 years Graphics card Nvidia GeForce GTX 1060(6GB) and above Mainstream model within the last 2 years -
Was this information helpful?
.svg)

Insta360 Trade-In
Get more from gear you're not using.
Learn more
Subscribe
Get the latest news from Insta360

I agree with the Privacy Policy and I'd like to receive the latest Insta360 news and deals by email. I understand I can contact Insta360 to unsubscribe at any time.

%20(1).svg)
%20(1).svg)
.svg)

Chat
Office Hours: 24/7
Start now

Email

