


Standalone Use
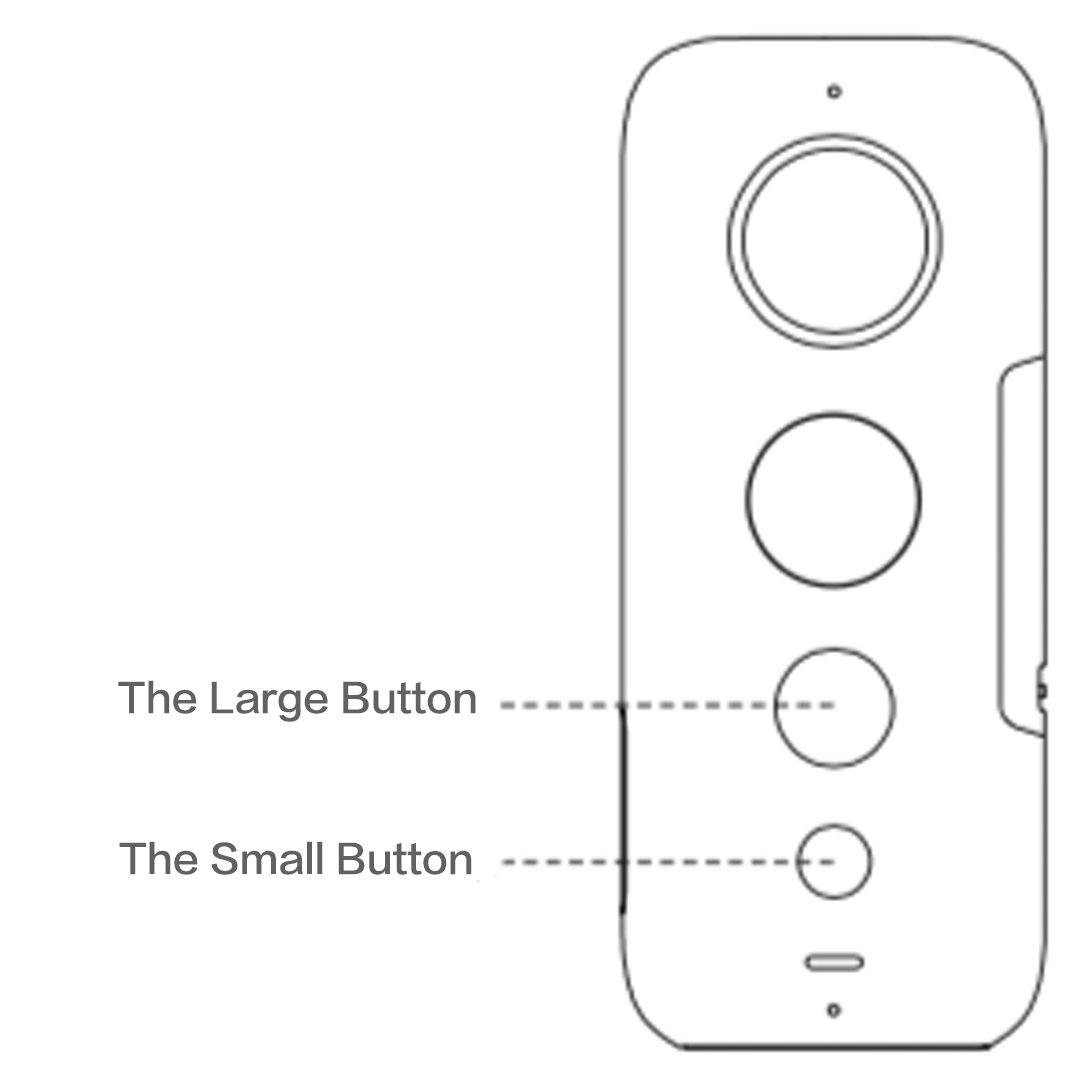 Button Functions:
The Large One: Shutter / Enter button
The Small One: Power / Switch mode button
Basics:
Power on: Press and hold the power button (small) to power on the camera.
Power off: Press and hold the power button to power off the camera.
Switching modes:
When the camera is on, press the power button to switch between camera modes e.g photo mode, video mode and settings.
In photo mode, press and hold the shutter button to choose between standard photo, HDR photo and Interval shooting photo modes.
In video mode, press and hold the shutter button to choose between standard video, Bullet Time video, Timelapse video and HDR video modes.
Button Functions:
The Large One: Shutter / Enter button
The Small One: Power / Switch mode button
Basics:
Power on: Press and hold the power button (small) to power on the camera.
Power off: Press and hold the power button to power off the camera.
Switching modes:
When the camera is on, press the power button to switch between camera modes e.g photo mode, video mode and settings.
In photo mode, press and hold the shutter button to choose between standard photo, HDR photo and Interval shooting photo modes.
In video mode, press and hold the shutter button to choose between standard video, Bullet Time video, Timelapse video and HDR video modes.
 In settings, press the shutter button to switch between photo, video, Wi-Fi and More settings, and press the power button to select which option you'd like to view.
 Taking a photo:
- 1. Press and hold the power button (small button) to power on the camera, switch to photo mode.
- 2. Press and hold the shutter button (large button) to switch between standard photo, HDR photo and Interval shooting photo modes.
- 3. Press the shutter button (large button) to take a photo.
- 1. Press and hold the power button (small button) to power on camera, switch to video mode.
- 2. Press and hold the shutter button (large button) to switch between standard video, Bullet Time video and Timelaspe video modes.
- 3. Press the shutter button to start / stop video recording.
- 1.Press and hold the power button (small button) to power on camera, press the power button to switch to settings, then press the shutter button (large button) to enter settings.
- 2.Press the shutter button to switch to "More Settings", press the power button to select QuickCap, then press the shutter button to switch ON / OFF.
- 3.When the camera is turned off, you can simply press and hold the shutter button to turn it on and start recording and press the shutter button again to stop recording and turn it off when QuickCapture is enabled.
 Timed photo:
- 1.Enter settings.
- 2.Press the power button (small button) to select "Timer".
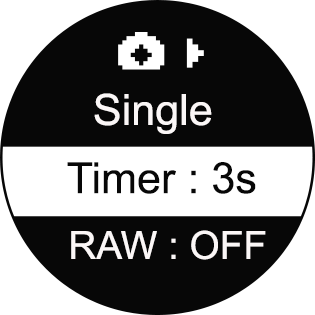
- 3.Press the shutter button (large button) to change the length of the timer: 3s, 5s, 10s, 15s, 20s, 30s, 45s, 60s.
- 4.After selecting a timer, switch to photo mode, press the shutter button to take a photo, you will hear a countdown sound emit from the camera. When the green indicator light blinks once, the photo captured successfully.
- 5.Connect ONE X to Phone/Pad to review.
- 6.Please keep the camera still and avoid shaking or moving while you are taking a timed photo.
- 1.Press and hold the power button to power on the camera, then enter settings menu.
- 2.Press the shutter button (large button) to switch to video settings. Then press the power button (small button) to scroll to shooting modes, after, press the shutter button to switch to Time-lapse
- 3.Press the power button to select parameters for Time-lapse shooting.
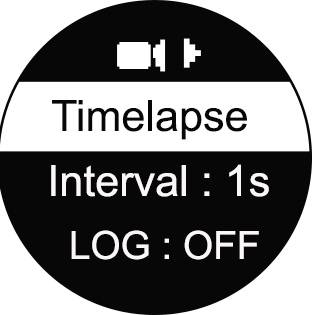
- 4.After choosing your parameters, switch to video mode, press and hold the shutter button to switch to Time-lapse video.
- 5.Press the shutter button to start recording, the indicator will alternate between blue and green.
- 6.Wait until the indicator stops flashing. This means the time-lapse video has finished, or you can press the shutter button again to stop recording.
- 7.Connect ONE X to Phone/Pad to review.
- 8.For best results avoid shaking or moving vigorously while you are taking a Time-lapse photo.
Was this information helpful?
.svg)


Insta360 Trade-In
Tirez profit du matériel que vous n'utilisez plus.
En savoir plus
Souscrire
Recevez les dernières nouvelles d'Insta360

J'accepte la politique de confidentialité et je souhaite recevoir les dernières nouvelles et offres d'Insta360 par email. Je comprends que je peux contacter Insta360 pour me désabonner à tout moment.

%20(1).svg)
%20(1).svg)
.svg)


Assistance à l'achat
Questions avant-vente
Commandes & Paiement
Retours & Remboursements
 Heures de bureau: 9:00-18:00 (UTC+1)
Assistance produit
Dépannage & Aide
Réparations & Garantie
Heures de bureau: 9:00-18:00 (UTC+1)
